

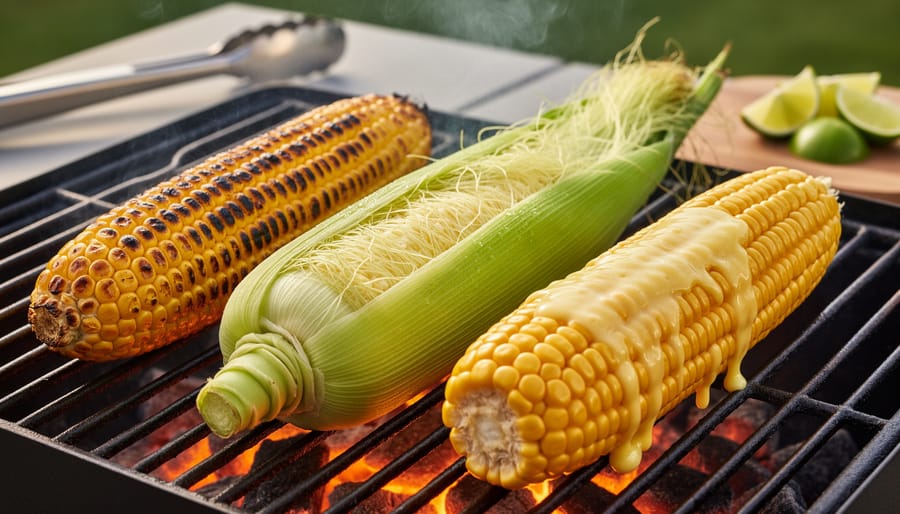
Grilling fresh corn on the BBQ takes 8 to 20 minutes depending on your method, and you’ve got three solid options: shucked and naked on the grates for maximum char (8 to 12 minutes), husked and silk-on for steamy, tender kernels (15 to 20 minutes), or partially husked with a butter brush-down for the best of both worlds (about 10 minutes). Each technique delivers a different balance of smoky caramelization and juicy bite, so your choice comes down to whether you’re chasing that blistered, fire-kissed finish or a gentler, more evenly cooked cob.
This summer, Canadian backyard cooks are reaching for fresh Ontario and Quebec corn at farmers’ markets and roadside stands, eager to turn those sweet, plump ears into a centerpiece side that rivals any steak or burger. The beauty of BBQ corn lies in its simplicity: you don’t need special equipment, marinades, or hours of prep. Just high heat, a bit of timing, and a willingness to turn the cobs every few minutes until you see those golden-brown spots forming. Whether you’re hosting a family reunion in cottage country or a weeknight dinner on the patio, mastering these three grilling methods means you’ll always know exactly how to coax out the best flavor and texture from every ear.
What You’ll Need to Grill Corn
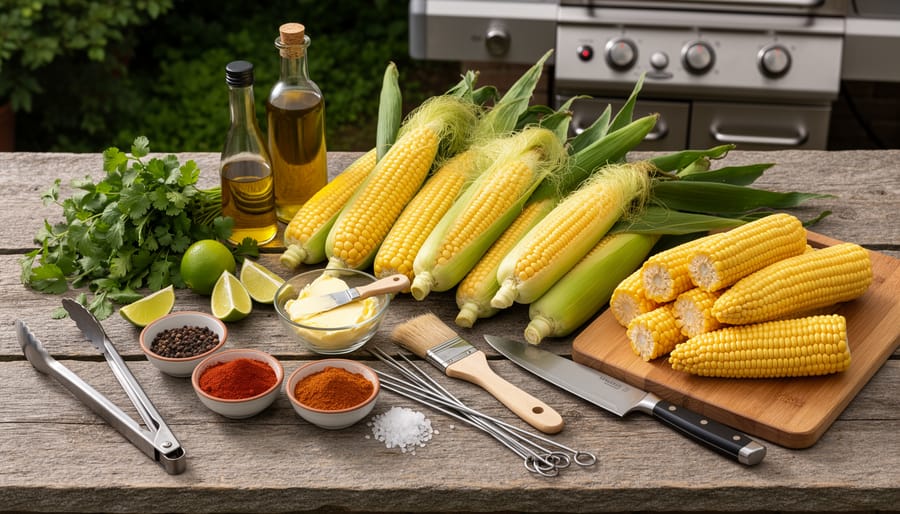
Grilling corn doesn’t require fancy equipment, but having the right tools makes the process smoother and safer. Here’s what you’ll need to get started:
- Fresh corn on the cob (look for tight, bright green husks and moist silk)
- BBQ (gas or charcoal both work perfectly)
- Long-handled tongs to safely turn corn without burning your hands
- Basting brush for applying butter or oil
- Butter or high-heat oil like canola or avocado oil
- Seasonings: salt, black pepper, lime wedges, chili powder, garlic powder, or your favorites
- Optional: aluminum foil for parceling, large bowl for soaking husks, kitchen twine for tying husks
When shopping for corn, support local farms and markets whenever possible. Ontario sweet corn in late summer and prairie varieties from Alberta and Manitoba deliver unbeatable freshness and flavor. Choose ears that feel firm with plump kernels all the way to the tip. Skip any with dried-out husks or browning silk, since freshness directly impacts how juicy and sweet your grilled corn will be.
Safety and Prep Tips Before You Start
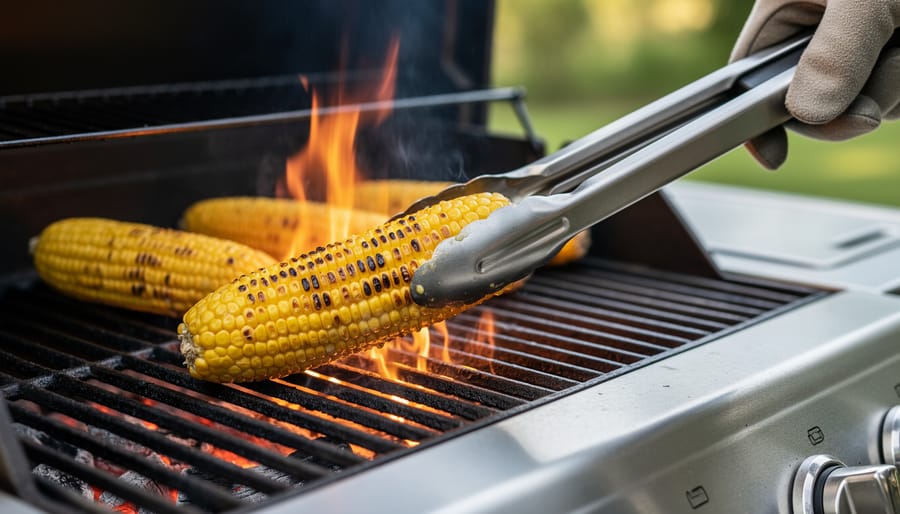
Before you start grilling, take a few minutes to set yourself up for safe, successful results. Grilling corn brings a few specific hazards, especially when you’re cooking kernels directly on the grates or working over open flames. A little prep now prevents burnt fingers, scorched husks, and unevenly cooked cobs.
First, use long-handled tongs to turn and move your corn. The heat from a very hot BBQ radiates strongly, and getting too close with short tools or bare hands can lead to painful burns. If you’re grilling corn with the husk still on over charcoal, keep the dry outer leaves away from direct flame, they’ll catch fire quickly if they dangle into the coals. For naked corn or partially husked ears, oil is your friend for flavor, but it also means flare-ups.
On the prep side, start by inspecting each ear. Look for plump, tightly packed kernels and fresh, green husks without dry brown patches. Trim any long, scraggly stems flush with the base so the cobs sit flat and turn easily on the grill. If you’re planning to grill husk-on, soak the whole ears in cold water for about ten minutes, this helps the outer layers steam rather than scorch, and it buys you a little forgiveness if you forget to turn them right away. Whether you’re going naked, husked, or somewhere in between, get your grill screaming hot before the corn goes on. That high heat is what delivers the char and caramelization that make grilled corn worth the effort.
Three Ways to Grill Corn on the BBQ
Method 1: Grilling Corn in the Husk
Grilling corn in the husk is the gentlest method, it steams the kernels while infusing just enough smoke. The husk acts as a natural wrapper, locking in moisture and protecting the corn from direct flame. You’ll get tender, juicy kernels with subtle char peeking through, perfect if you prefer a softer bite over aggressive browning.
Start by gently peeling back the husk without tearing it off completely. You want it to stay attached at the base so you can pull it back over later. Yank out all the silk, those fine threads burn quickly and turn acrid on the grill. Once the kernels are exposed, brush them generously with melted butter or a neutral oil like canola. This is your chance to season: sprinkle on salt, cracked pepper, garlic powder, or a pinch of smoked paprika if you’re feeling adventurous.
Pull the husk back over the corn, enclosing the kernels. If the husk feels dry or brittle, soak the whole ear in cold water for ten minutes before grilling. This prevents scorching and creates extra steam inside the husk. Some folks tie the top with a strip of husk or kitchen twine, but it’s optional, the husk usually clings on its own.
- Peel back the husk without detaching it from the base, then remove all the silk strands.
- Brush the exposed kernels with melted butter or oil and season as desired.
- Pull the husk back over the corn, optionally soaking the whole ear in water for ten minutes.
- Place the corn on the hot grill and turn every three to five minutes.
- Cook for fifteen to twenty minutes total, until the kernels feel tender when gently squeezed through the husk.
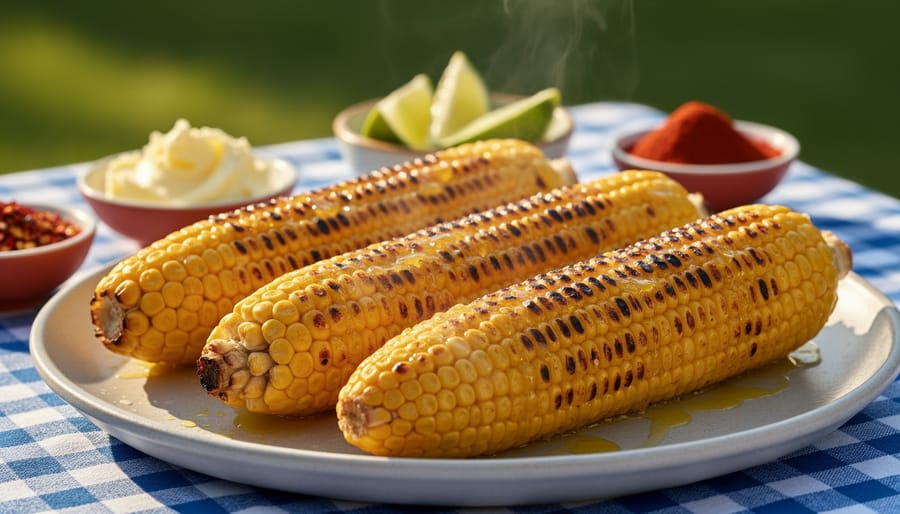
You’ll know it’s ready when the husk darkens and the corn feels soft to the touch. A few charred spots on the outer leaves are normal, they add to the smoky aroma without drying out the kernels. Peel back the husk at the table for a rustic presentation, or shuck it entirely and slather on more butter.
Method 2: Grilling Naked Corn (Husk and Silk Removed)
Grilling corn with the husk and silk completely removed delivers the deepest char and the most pronounced smoky flavor, it’s the method of choice when you want those caramelized, slightly blackened kernels that taste like summer. Without the husk’s protective layer, the corn sits directly on the grill grates, exposing every kernel to the fire’s heat and developing those coveted grill marks. This technique is fast, dramatic, and perfect for Canadian BBQ parties where you want bold flavor and visual appeal.
Start by shucking your corn completely. Peel away all the husk layers and pull off every strand of silk, then rinse the cobs under cool water to remove any lingering bits. Pat them dry with a clean towel. Brush each cob generously with melted butter, olive oil, or a neutral oil, this coating prevents sticking and helps the kernels brown evenly. Season lightly with salt at this stage if you like, or wait until after grilling to add your finishing touches.
- Preheat your BBQ to very hot, you want the grates nearly smoking before the corn goes on.
- Place the shucked, oiled corn directly on the grill grates, positioning each cob perpendicular to the bars to maximize contact.
- Let the corn sit undisturbed for about two minutes, then rotate a quarter turn using long-handled tongs.
- Continue turning every two to three minutes, working your way around the cob until all sides show light browning and char spots.
- Total cooking time is eight to twelve minutes, depending on your grill’s heat and how much char you prefer.
Watch for flare-ups, especially if you’ve used butter, fat dripping onto the coals or burners can cause flames to leap up. If a flare-up happens, move the corn to a cooler zone for a moment, then return it to high heat. The kernels should be tender, fragrant, and spotty with golden-brown to dark char by the time you pull them off. This method turns simple corn into a smoky, caramelized treat that Canadian food bloggers love to photograph and share.
Method 3: Partially Husked (Best of Both Worlds)
This method has become a go-to at backyard BBQs across Ontario and the prairies for good reason. You get those beautiful char marks and smoky flavor without giving up the built-in handle that makes turning and serving so much easier. The exposed kernels caramelize while the remaining husk protects your hands and keeps some moisture locked in.
- Grab your fresh corn and carefully peel back the husk, stopping about an inch from the base. You want to keep it attached like a handle.
- Pull away all the silk strands. This is easier than removing them after grilling, trust me.
- Brush the exposed kernels generously with melted butter or oil, then season with salt, pepper, or your favorite spice blend. A pinch of smoked paprika works beautifully here.
- Leave the husk pulled back, creating a natural grip at the base.
- Place the corn directly on your very hot grill grates, kernels facing down.
- Turn every two to three minutes, rotating to expose all sides to the heat.
- Grill for about 10 minutes total until the kernels are tender, golden, and showing nice char marks all around.
The husk handle makes this method especially popular at food blogger meetups and community cookouts where you’re serving a crowd. Guests can grab their corn straight off the grill without burning their fingers, and the rustic presentation looks fantastic in photos. You’ll notice the exposed kernels develop that sweet, caramelized crust while staying juicy inside. If any husk edges start to blacken too much, just rotate the corn to keep the flame away from the dry leaves.
How to Tell When Your Corn Is Done
The surest test for doneness is texture: pierce a kernel with a fork or the tip of a knife. It should slide in easily with just a bit of resistance, not feel rock-hard or mushy. For naked or partially husked corn, look for light char marks across the kernels and a sweet, roasted aroma rising from the grill. Husk-on corn won’t show visible browning, but the husk will feel soft and pliable, and the cob will give slightly when you press it with tongs.
Overcooking is the most common mistake at Canadian summer cookouts. If kernels start to shrivel or turn leathery, you’ve left them on too long. Trust your senses: fragrant, tender, and lightly charred means it’s time to move your corn to a platter and start layering on those toppings.
Flavour Finishes and Toppings
Once your corn is perfectly charred, the real fun begins. A simple swipe of butter and a pinch of flaky salt is always a winner, but summer 2026 is all about bold, playful toppings that turn grilled corn into a conversation starter at your cookout.
- Classic butter and salt, timeless, simple, and lets the sweet char shine through
- Mexican-style elote, slather with mayo, crumble cotija cheese on top, dust with chili powder, and finish with a squeeze of lime
- Herb butter, whip softened butter with fresh parsley, chives, and a pinch of garlic for a bright, garden-fresh finish
- Maple glaze, brush warm corn with pure Canadian maple syrup and a touch of smoked paprika for a sweet-savory twist
- Smoky garlic rub, mix minced garlic, smoked paprika, and olive oil, then brush generously while the corn is still hot
Don’t be afraid to experiment and layer flavors. Toronto chef Michael Nguyen has been serving grilled corn topped with miso butter and toasted sesame at his summer pop-ups across the GTA, while Canadian food blogger Sarah from Planted and Picked shared a viral recipe pairing grilled corn with whipped feta and za’atar. These creative spins align beautifully with the spirit of Canadian summer recipes that celebrate local ingredients and bold, approachable flavors.
Whatever combination you choose, snap a photo and share it with the food blogger community. Grilled corn is one of those dishes that brings people together, and your twist might just inspire someone else’s next backyard feast.
Common Questions About Grilling Corn
Do I need to soak corn before grilling?
Yes, if you’re grilling with the husk on. Soaking for ten minutes helps prevent the husk from scorching and keeps the kernels moist. For naked corn or partially husked methods, skip the soak and brush the kernels with oil instead.
Can I grill frozen corn on the cob?
You can, but thaw it completely first. Grilling frozen corn leads to uneven cooking, with the outside charring before the inside warms through. Let it reach room temperature, pat dry, then proceed with any of the three methods.
How do I prevent corn from sticking to the grill grates?
Oil is your friend. Brush the corn with butter or a neutral oil before placing it on the grill, and make sure your grates are clean and preheated. If sticking persists, lightly oil the grates themselves with a paper towel dipped in vegetable oil.
Does grilling corn work on a gas BBQ?
Absolutely. Gas grills deliver consistent, high heat that’s perfect for all three methods. Preheat to high, then follow the same timing and turning instructions. The only difference is you won’t get quite the same deep smokiness as charcoal, but the char and flavor are still excellent.
How should I store leftover grilled corn?
Let the corn cool to room temperature, then refrigerate in an airtight container for up to three days. Reheat by placing it back on a medium grill for a few minutes to crisp the kernels, or warm in a 350°F oven wrapped in foil.
These questions come up every summer at Canadian cookouts, especially when friends gather for their first BBQ of the season. The husk-on versus naked debate is a perennial favorite, and knowing you can rescue frozen corn in a pinch makes weeknight grilling much more spontaneous. Gas grill owners sometimes worry they’re missing out, but the convenience and control more than compensate for the slight difference in smoke flavor. Leftovers rarely last long, but when they do, a quick reheat on the grill brings back that just-charred sweetness.